Setup and Configuration
Setting up Appvibe Test Management for monday.com is a straightforward process designed to fit seamlessly into your existing workflows. This chapter covers everything from installing and configuring the tool to customizing it for your team's unique testing needs. Follow the step-by-step guides to ensure a smooth setup, and use the configuration tips to optimize your testing processes from day one.
Installing Appvibe Test Management
Getting started with Appvibe Test Management for monday.com is simple and fast. This page outlines the installation process and any prerequisites needed to ensure a smooth integration.
Prerequisites:
Before installing Appvibe, ensure you have the following:
- monday.com Account: You need an active monday.com account. Admin-level access is required for installation.
- Appvibe Subscription: Ensure you have an Appvibe license or subscription. Contact Appvibe support if you're unsure of your license status.
- Permissions: Make sure you have the correct permissions in monday.com to install third-party apps and access the boards where you plan to manage test cases.
Step-by-Step Installation Guide:
-
Access the monday.com App Marketplace:
- Log in to your monday.com account.
- Navigate to the App Marketplace from the menu on the left side of the screen.
-
Search for Appvibe Test Management:
- In the search bar, type "Appvibe Test Management" and select it from the results.
-
Install the App:
- Click the "Install" button and follow the on-screen prompts to add Appvibe to your monday.com environment.
-
Authorize the Integration:
- You'll be prompted to grant permissions for Appvibe to access your monday.com account. This allows Appvibe to interact with your boards, update test cases, and execute test cycles.
- Click Authorize to proceed.
-
Set Up Your First Test Management Board:
- Once installed, Appvibe will guide you through creating a Test Management Board. This board will serve as the hub for all your test cases, test cycles, and reports.
- You can either create a new board dedicated to test management or integrate Appvibe into an existing board.
-
Invite Team Members:
- Use monday.com’s invite functionality to add team members to your Test Management Board. Ensure that each team member has the correct permissions (e.g., Testers, Test Managers).
Your Appvibe Test Management setup is now complete! You can proceed to the configuration steps to tailor the tool to your needs.
Getting Started
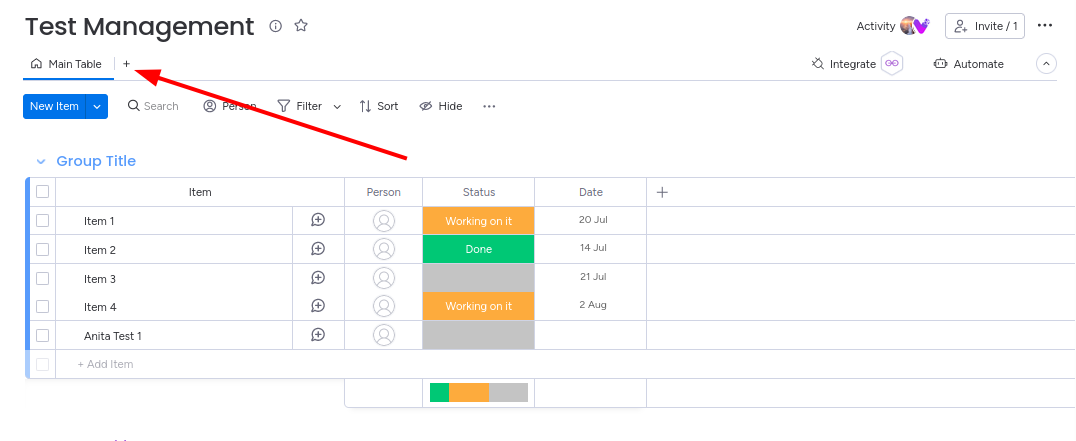
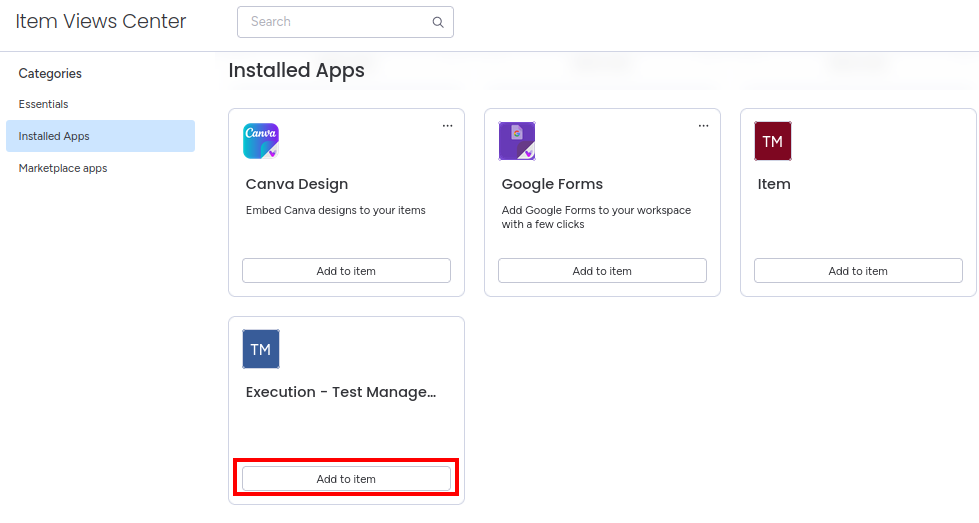
After installing the app, first, add it to your board view, by following these steps:
- Click on the + icon for your monday board

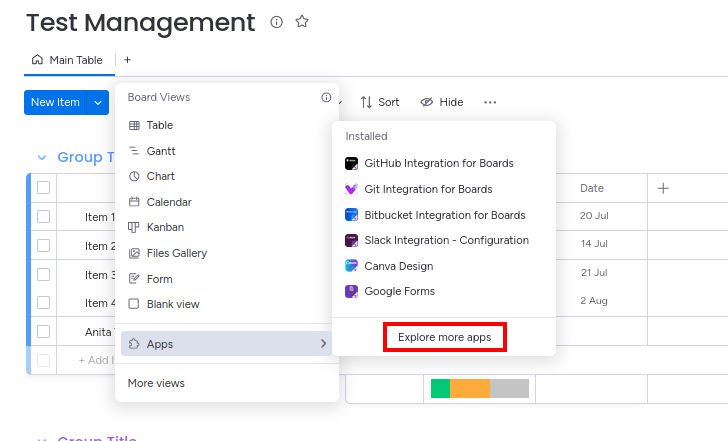
- Go to "Apps" > "Explore more apps"

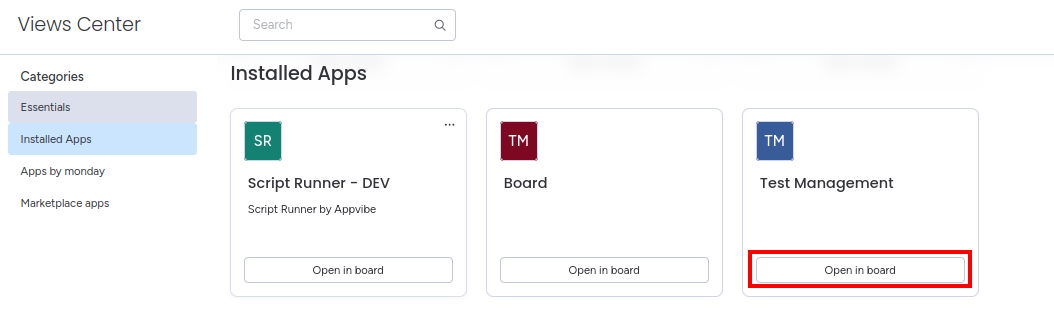
- Under "Installed Apps" find the Test Management app and click on "Open in board"

- Now the app is added to your board:

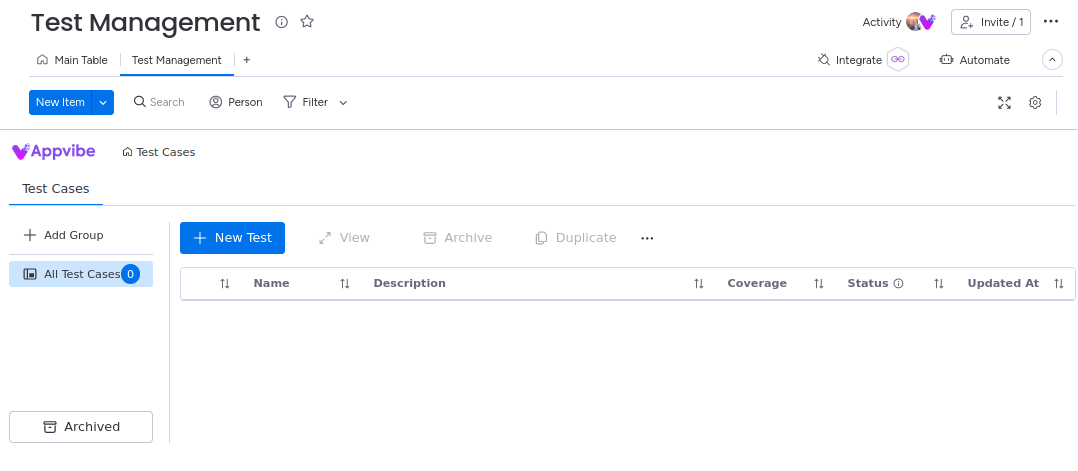
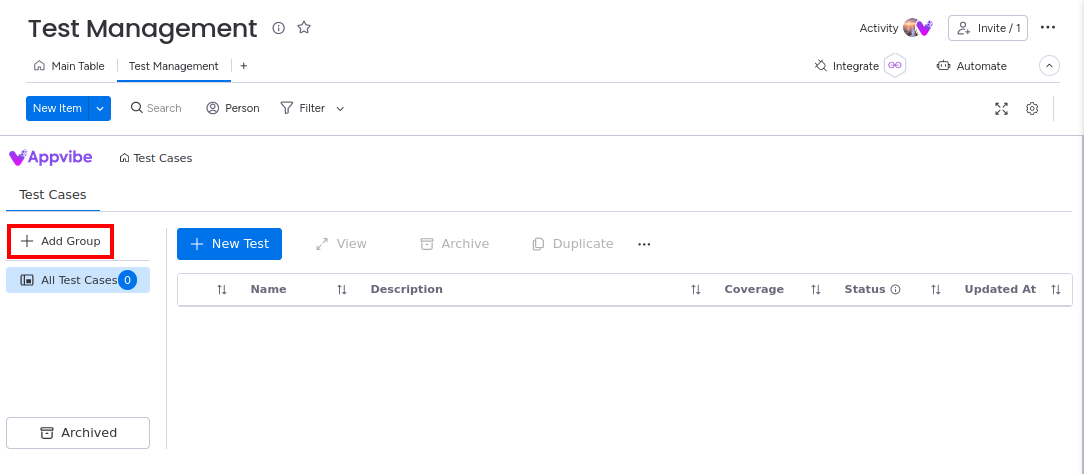
Create a Test Group
- To create a test group, click on "Add Group"

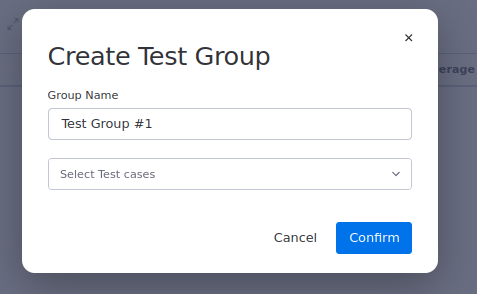
- Fill in the name. If you have already added test cases, you can select them from the dropdown.

- Click on Confirm to save.
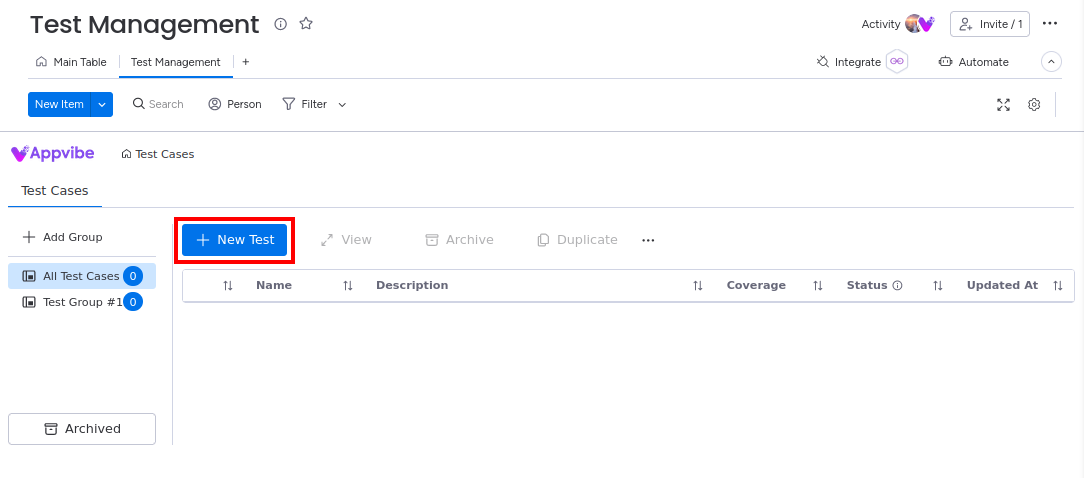
Create a Test Case
- To create a test case, click on "New Test".

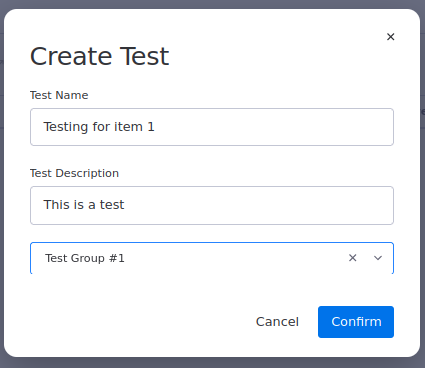
- Fill out the details. If you have already added a test group, you can select it from the dropdown.

- Click on Confirm to save.
Edit the test case and add testing steps
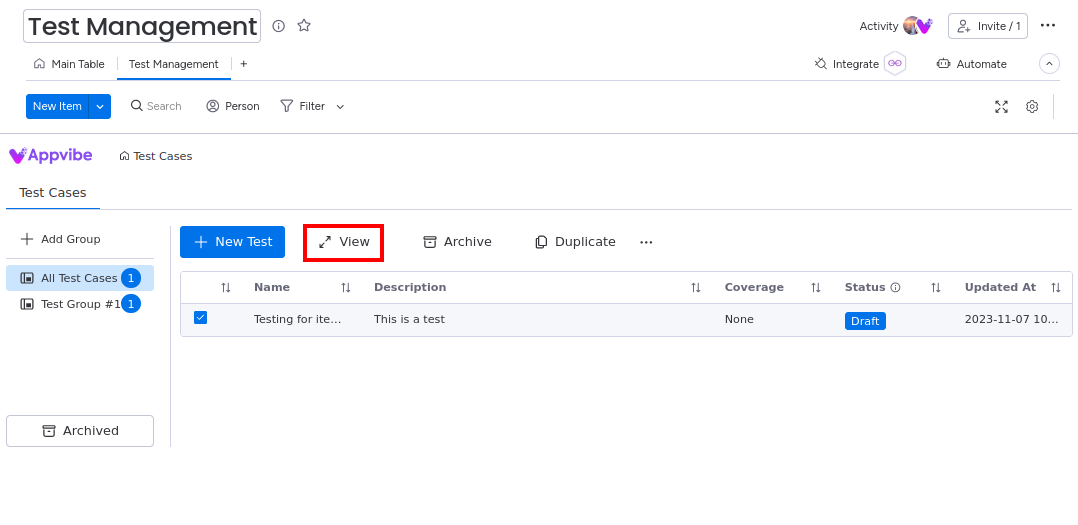
- Select a test case from the table by checking the box next to it

- Click on "View" in the menu

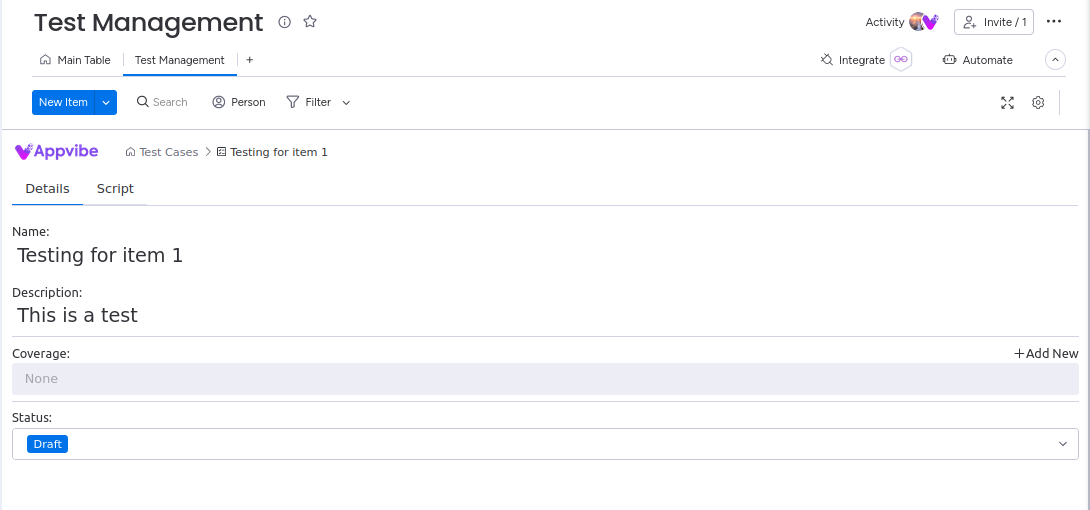
- Here, you can edit the basic details of the test. You can also edit the status of the test Draft/Approved/Declined. This can be used to signal to the team which tests should be used.

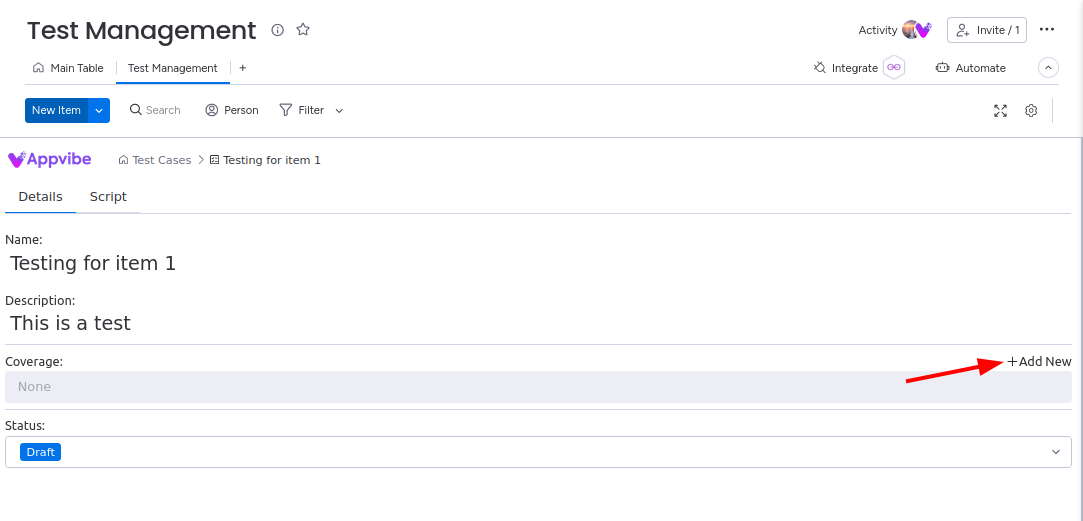
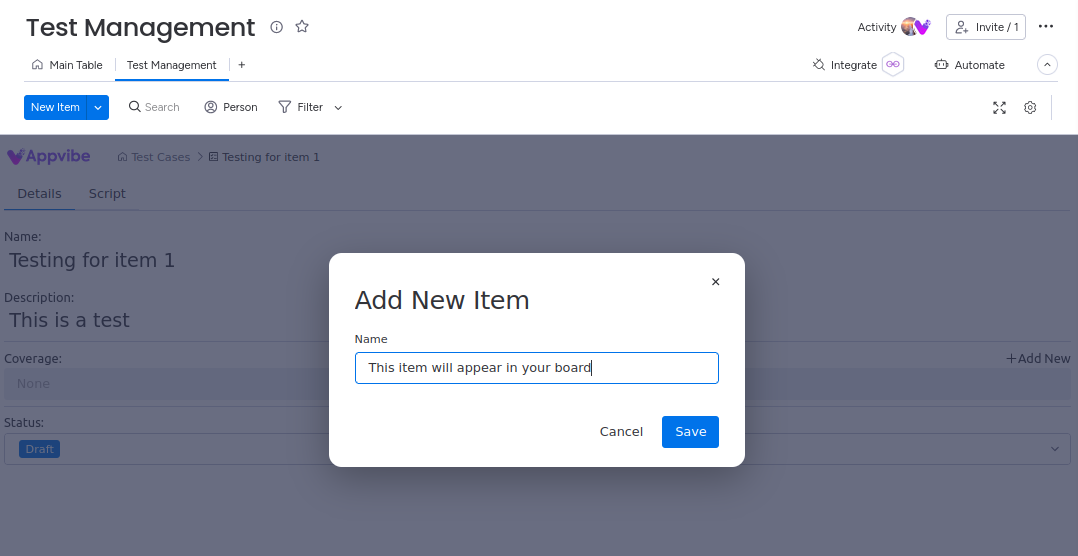
- Use the "Coverage" field to add tests to your monday board "Main Table". This will allow you and your team to execute the steps you add to the test. You can add multiple items to one test case.


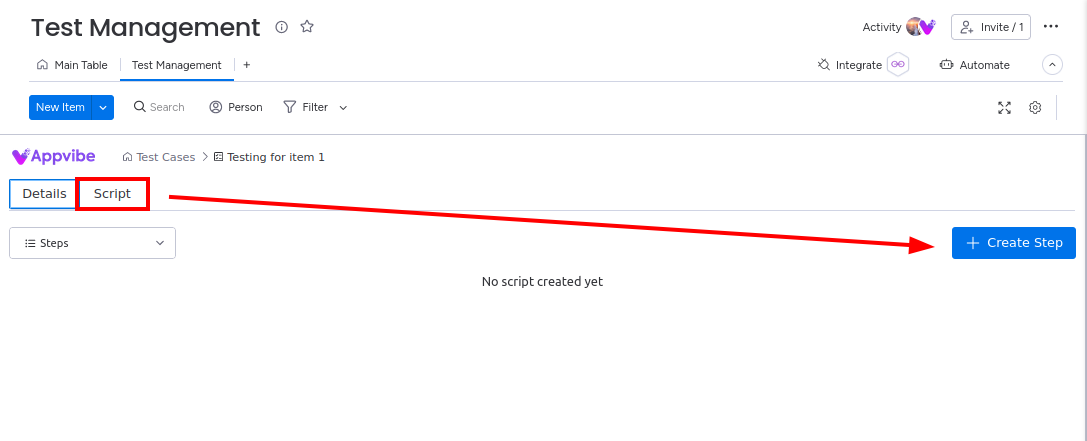
- To add testing steps, switch to the "Script" tab and click on "Create Step".

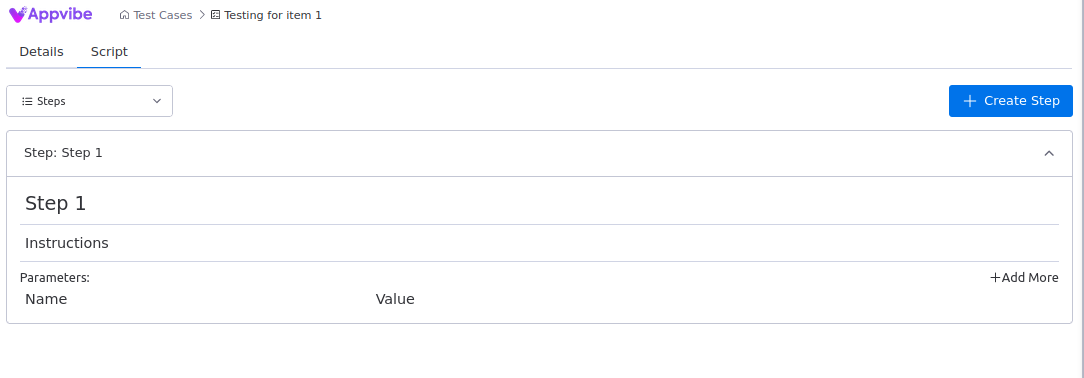
- Fill out the details of the testing step. Repeat it for as many testing steps you need.


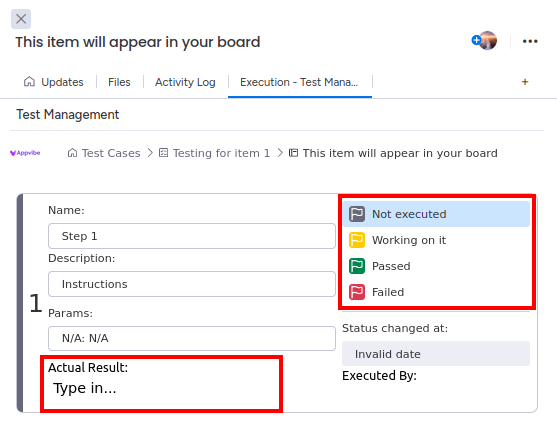
Using the Item View
Use the item view to execute the testing steps you added according to the previous instructions.
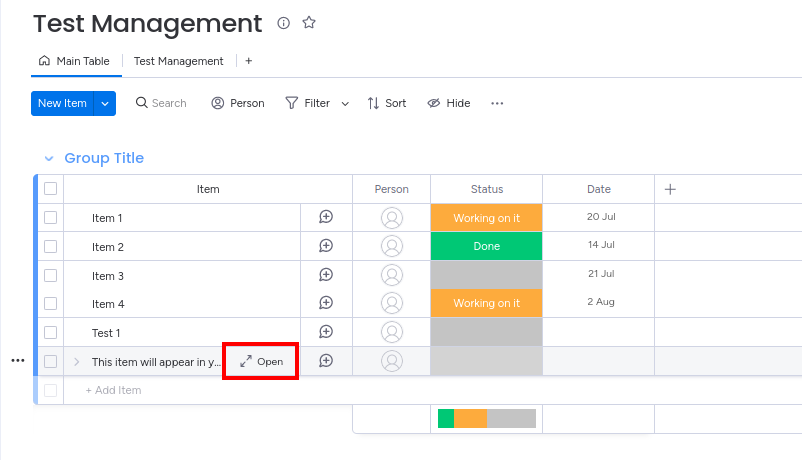
- Open the item you or a team mate has added from the "Coverage" field.

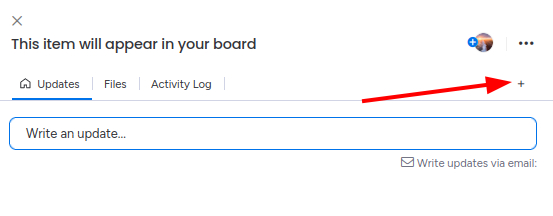
- If you don't see the Test Management Execution screen, click on the + icon and find it under the installed item views.


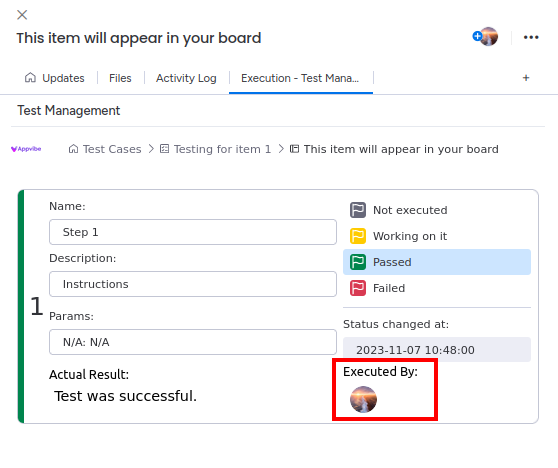
- On the execution screen, you can update the status of the testing step. You can also type in the actual result of your test.

- When you execute the testing step, the app will record that you worked on it.

Configuration Settings
Once Appvibe Test Management is installed in your monday.com account, you can configure the tool to match your team’s testing workflow. Proper configuration will help streamline test case creation, test execution, and reporting.
Key Configuration Areas:
-
Board Customization:
- Once your Test Management Board is set up, you can customize it to reflect the key elements of your testing process.
- Columns: Add or modify columns for the Test Case ID, Test Step, Expected Result, Actual Result, Status (Pass/Fail), and other relevant information.
- Groups: Organize your board into groups such as "New Test Cases," "In Progress," and "Completed" to manage test case workflows.
-
Permissions and Roles:
- Assign user roles to define who can create, modify, and execute test cases. Common roles include:
- Tester: Can execute test cases and record results.
- Test Manager: Can create, modify, and manage test cases, test cycles, and results.
- Set permissions for each role to ensure only authorized team members can make changes to critical data.
- Assign user roles to define who can create, modify, and execute test cases. Common roles include:
-
Automations:
- Set up monday.com automations to streamline workflows. For example:
- Automatically move test cases from the "New Test Cases" group to the "In Progress" group when execution begins.
- Notify team members when a new test cycle is ready for execution or when a test case is assigned to them.
- Set up monday.com automations to streamline workflows. For example:
-
Integrations:
- Appvibe integrates with other tools like Jira, GitHub, and external testing tools. Configure these integrations based on your team’s needs to ensure a smooth flow of information.
- For example, you can link failed test cases to Jira tickets for easier defect tracking and resolution.
-
Status Labels:
- Configure status labels for your test cases and test cycles. For example, use labels like "Passed," "Failed," "Blocked," and "In Progress" to track the status of test execution.
- You can customize these labels based on your team's terminology and preferences.
-
Custom Fields:
- Add custom fields to capture specific information about your test cases. For example, you may want to add fields for Priority, Severity, or Test Case Type (e.g., Functional, Regression).
Initial Setup Checklist
To ensure everything is properly configured and ready for use, follow this checklist after setting up Appvibe Test Management in monday.com:
1. Test Management Board Created
- Ensure your Test Management Board is set up with the correct columns and groups (e.g., Test Case ID, Status, Expected Results).
2. User Roles and Permissions Assigned
- Verify that team members are assigned appropriate roles (Testers, Test Managers) and have the correct permissions.
3. Automation Rules Enabled
- Confirm that automation rules are working properly to help with task assignments, notifications, and board updates.
4. Test Cases Entered
- Add a few test cases to your Test Management Board to ensure the setup is functioning as expected.
- Make sure test case templates are easy to use and test steps are clear.
5. Test Cycle Configured
- Create an initial test cycle to group your test cases for execution.
- Assign test cases to the test cycle and verify the priority and deadlines are set correctly.
6. Status Labels and Custom Fields Configured
- Verify that your status labels (e.g., Passed, Failed, Blocked) and custom fields (e.g., Priority, Severity) are correctly configured and applied to test cases.
7. Integrations Set Up (If Needed)
- If you're using integrations (e.g., Jira, GitHub), ensure they are correctly configured and synced with your monday.com boards.
8. Invite Team Members
- Make sure all necessary team members have been added to the Test Management Board and have access to Appvibe Test Management.
Once all these steps have been completed, you’re ready to start using Appvibe Test Management to create, execute, and manage your test cases efficiently within monday.com!