Feature Reference
Adding Time to An Item
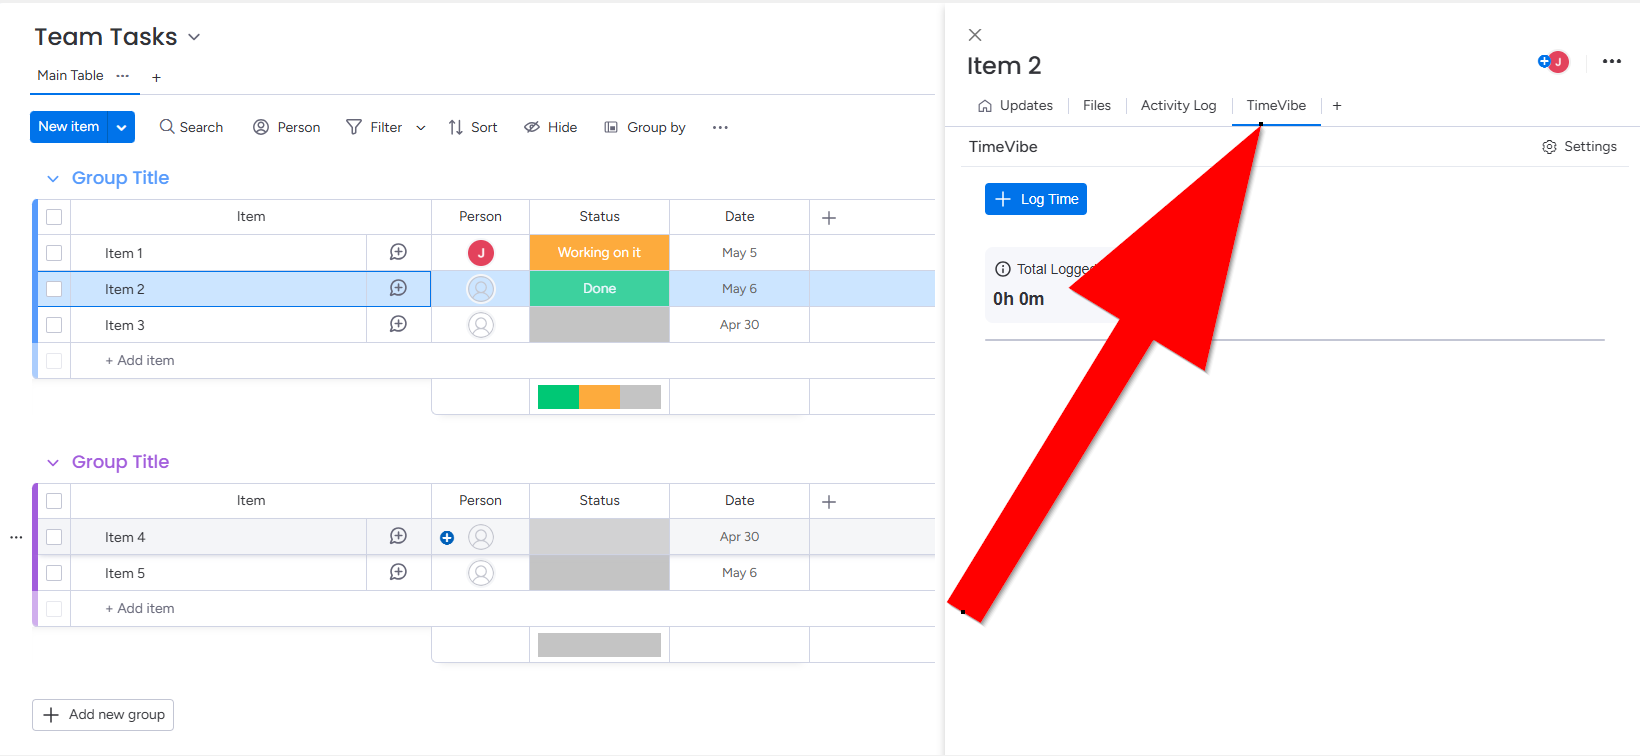
You can access and work with TimeVibe from at Item. Open the item you want to work with and select the TimeVibe tab to add, edit or remove time for that specific item.
Logging Time for an Item
Easily manage time tracking with TimeVibe directly from an item in monday.com. Open the desired item, navigate to the TimeVibe tab, and effortlessly add, edit, or delete time entries specific to that item.
Adding Time
In the TimeVibe tab, click the blue + Log Time button. This will open the Log Time popup, where you can input your time details. The screen shows the total logged time for the item (starting at 0h 0m if no entries exist) and provides an interface to add new time records efficiently.
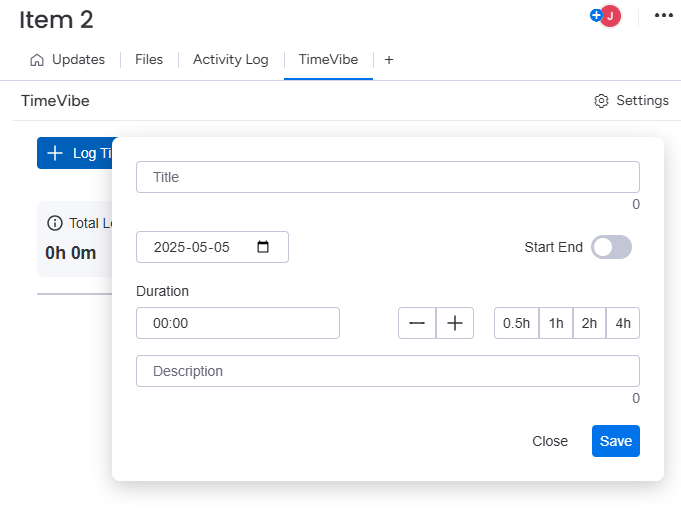
Details of each field are as follows:
Title: Enter a short description of the work or task.
Date: Select the date of the time entry (defaults to today’s date). You can change this if logging past or future time.
Start End: Enable this switch if you want to enter a specific start and end time. Otherwise, you can log just the total duration.
Duration: Enter total time spent using the input field or by clicking the quick buttons (0.5h, 1h, 2h, 4h) or the +/- controls for fine-tuning.
Description: Description of time entered. (optional)
Save Button: Click Save to confirm and log the entry. Clicking Close will discard the input.
Editing or Deleting Time
In the TimeVibe tab, each logged time entry has options to edit or delete. To edit, click the edit icon or button next to the entry, modify the details, and save your changes. To delete, click the delete icon or button, and confirm the removal. These actions respect your user permissions and will update the total logged time accordingly.
Adding Time within a Workspace
Click the TimeVibe app in your workspace. This loads a screen showing all logged time for that workspace. To add time, click the + Log Time button. This will display the Log Time popup.
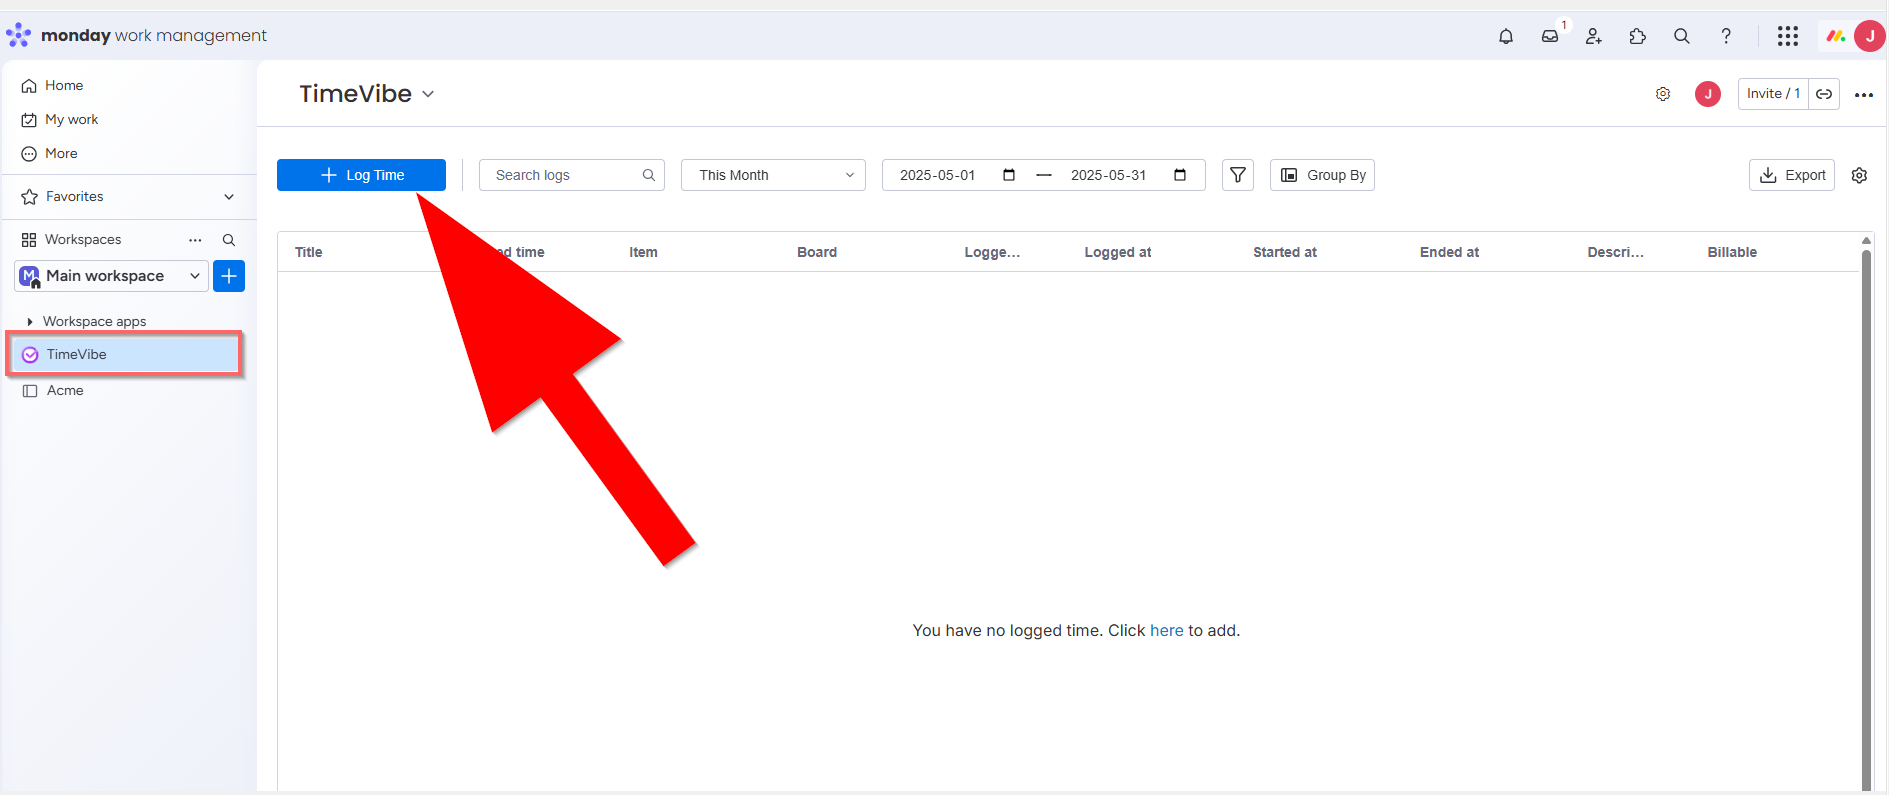
In the Log Time popup, you can add time for a specific item in a board.
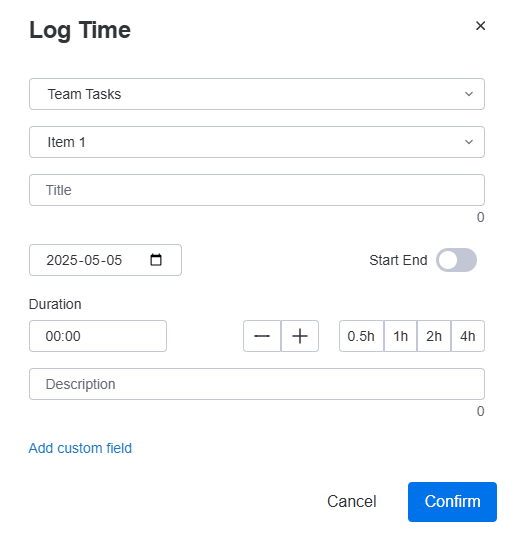
Details of each field are as follows:
Select a board: Select a specific board in your workspace
Select an item: Select a specific item for the board you selected.
Title: Enter a short description of the work or task.
Date: Select the date of the time entry (defaults to today’s date). You can change this if logging past or future time.
Start End: Enable this switch if you want to enter a specific start and end time. Otherwise, you can log just the total duration.
Duration: Enter total time spent using the input field or by clicking the quick buttons (0.5h, 1h, 2h, 4h) or the +/- controls for fine-tuning.
Description: Description of time entered. (optional)
Add custom field: Click on here if you want to add a custom field. The custom field can be a toggle, dropdown, or text field. Fields commonly added by our users are fields like Billable, Customer, Overtime, Approved, Project etc.
Save Button: Click Save to confirm and log the entry. Clicking Close will discard the input.
Search
Date
Date Range
Filter
Group by
export
Workspace
Custom Fields
auto timeexport