Getting Started
Overview
Getting started with TimeVibe is easy — just install the app, connect it to your boards, and you’re ready to start tracking time right away. With a few quick steps, your team can begin logging time and generating insights effortlessly.
Installation
Below are the steps to install TimeVibe in your Monday.com workspace.
✅ Step 1: Make sure you’re a workspace admin — only admins can install apps.
✅ Step 2: Go to the TimeVibe app page: TimeVibe on Marketplace
✅ Step 3: Click Install and choose the workspace you want to install it on.
✅ Step 4: Approve the requested permissions so TimeVibe can access boards, users, and dashboards.
✅ Step 5: Wait for the confirmation that installation is complete.
✅ Step 6: That is it. The TimeVibe app is now installed.
Adding Time within a Workspace
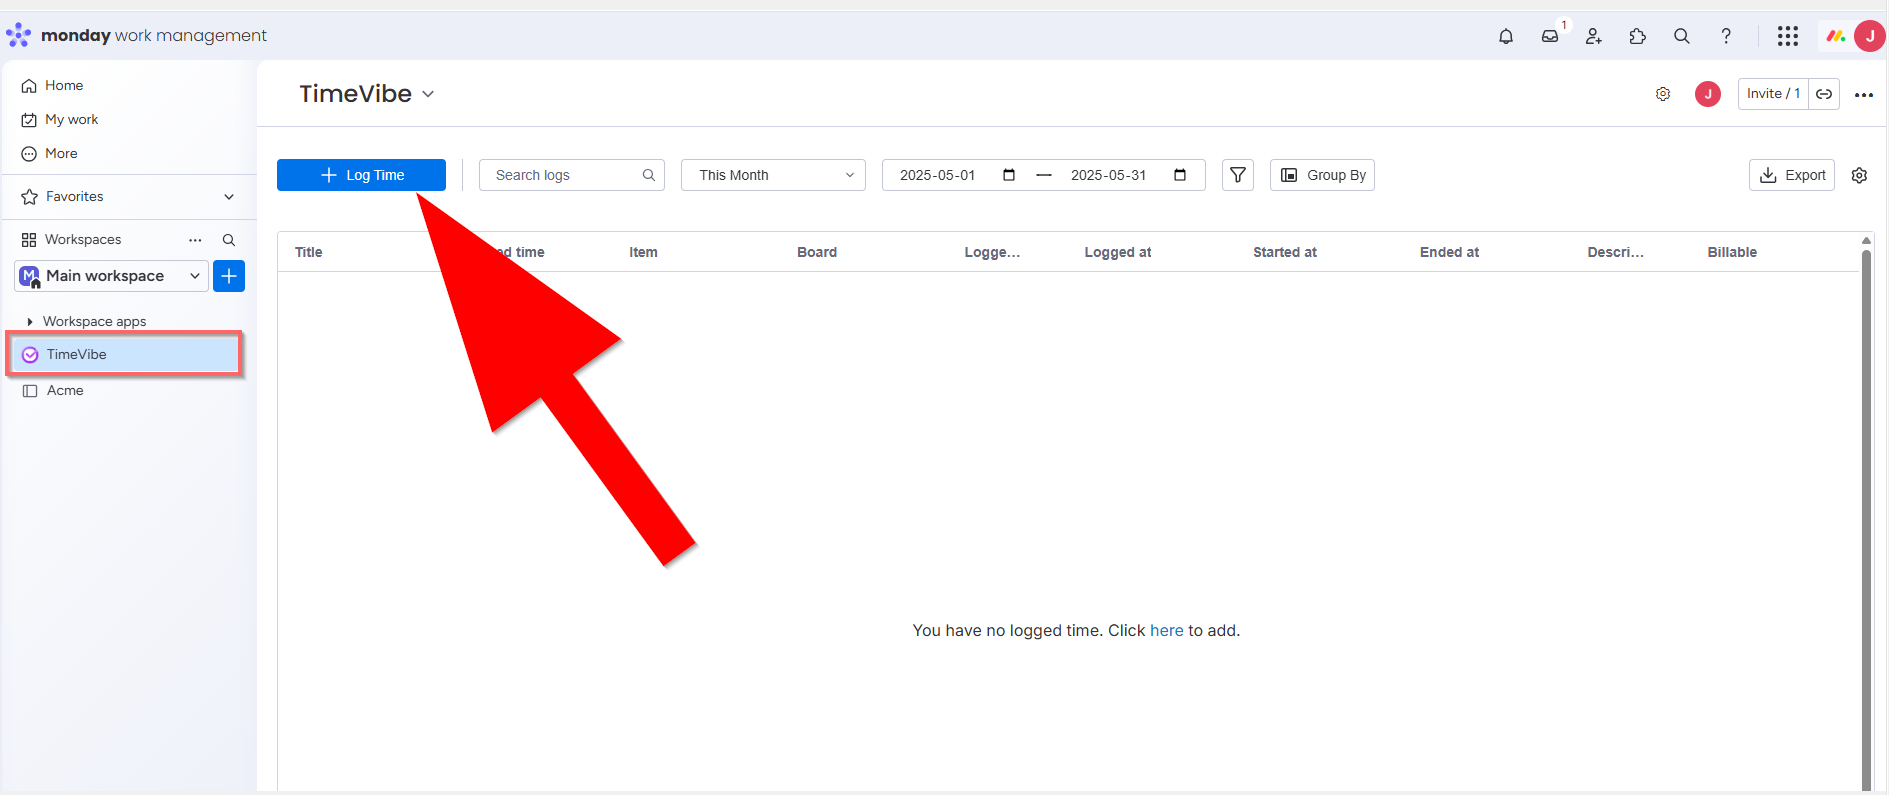
Click the TimeVibe app in your workspace. This loads a screen showing all logged time for that workspace. To add time, click the + Log Time button. This will display the Log Time popup.
In the Log Time popup, you can add time for a specific item in a board.
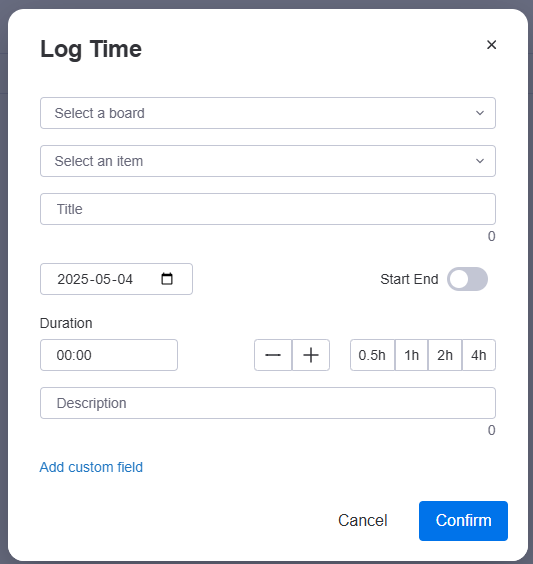
Details of each field are as follows:
Select a board: Select a specific board in your workspace
Select an item: Select a specific item for the board you selected.
Title: The title of your time entry.
Date: Date of time recorded. (Today's date by default)
Start End: Select if you want to add a specific start and end time.
Duration: Time spent for a specific entry. Use the "-", "+", "0.5h", "1h", "2h", "4h" for speed of entry.
Description: Description of time entered. (optional)
Add custom field: Click on here if you want to add a custom field. The custom field can be a toggle, dropdown, or text field. Fields commonly added by our users are fields like Billable, Customer, Overtime, Approved, Project etc.
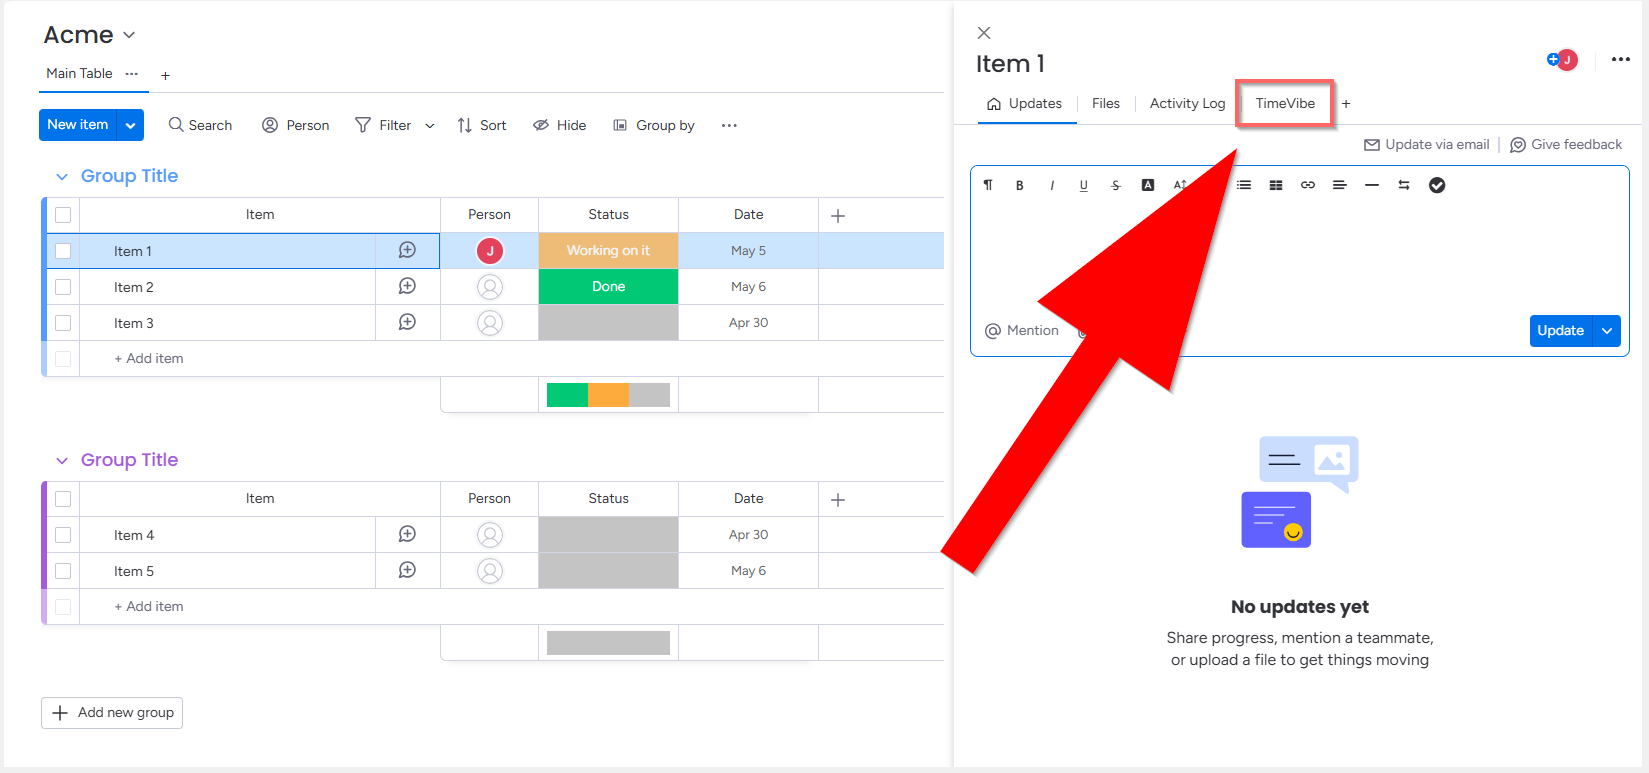
Adding Time within an Item
Adding time from within an Item is easy. From the item, click on the "TimeVibe" tab to load time info for the specific Item.
Once the "TimeVibe" tab loads, click on the + Log Time button to add time.
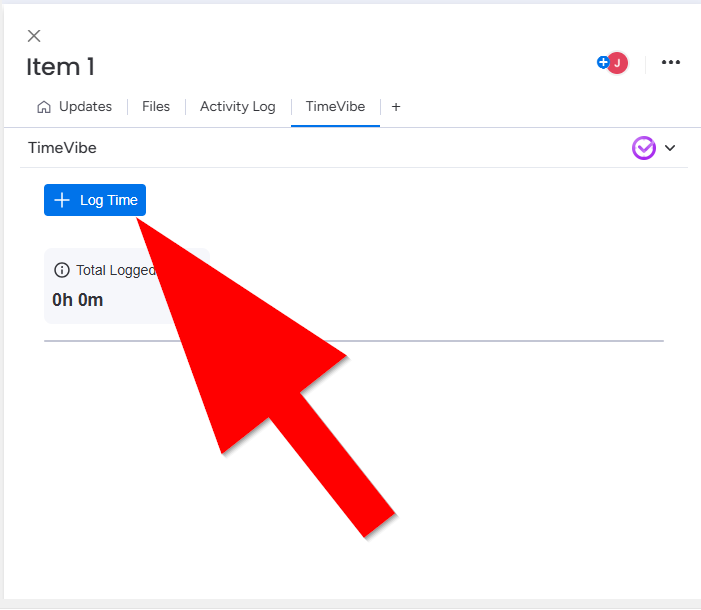
This will load the Log Time popup allowing you to add time for the selected item.
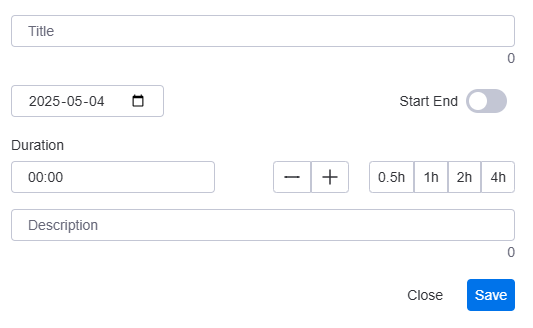
Details of each field are as follows:
Title: The title of your time entry.
Date: Date of time recorded. (Today's date by default)
Start End: Select if you want to add a specific start and end time.
Duration: Time spent for a specific entry. Use the "-", "+", "0.5h", "1h", "2h", "4h" for speed of entry.
Description: Description of time entered. (optional)
Exporting Time Data
Exporting or downloading time reports for a specific workspace is simple — with just a few clicks, you can generate detailed reports filtered by team, project, or date range. TimeVibe makes it easy to access, review, and export your tracked time data for further analysis or billing.
Exporting Time Data
Load the TimeVibe view within your workspace to load all entered time in that workspace. Use the highlighted tools to search, filter or group by to modify the time entries you wish to export.
Click on the Export button to export your time data to an Excel file or Monday board.

For more detailed information on all available capabilities, be sure to check out the Complete Feature Reference. It provides an in-depth breakdown of every feature and configuration option to help you get the most out of TimeVibe.
No Comments