Time Tracking for monday.com
The purpose of this app is to track time spent working on items on your monday boards. The app will log the time for different users separately, so you can keep track of your team's productivity.
Installing the app
To install the app, follow these steps:
- Click on the "Install" option on the monday marketplace
- Select whether you want to install the app to all of your workspaces or just one selected workspace, then click "Install" again.
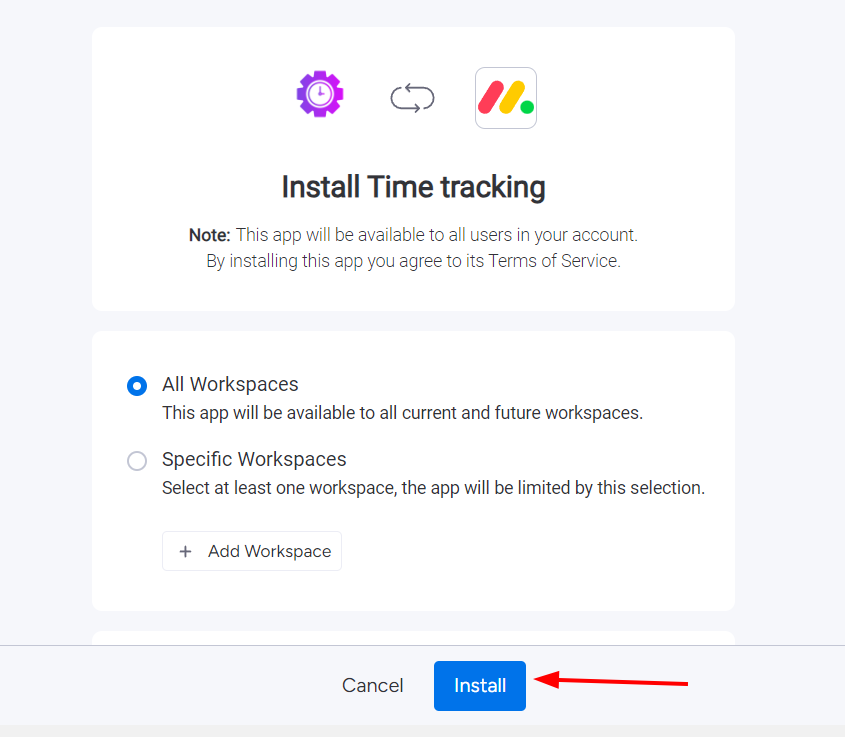
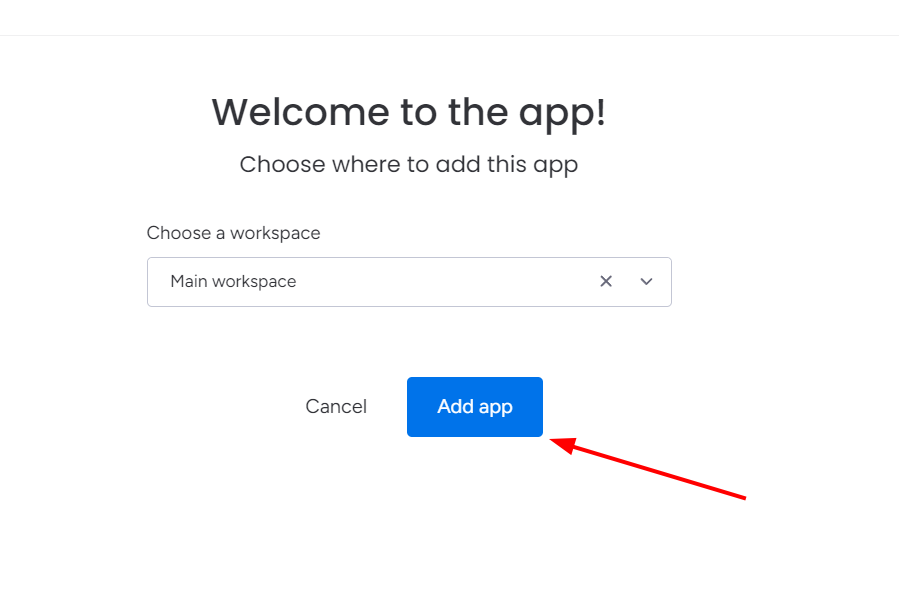
- Finally, select a workspace to get started.


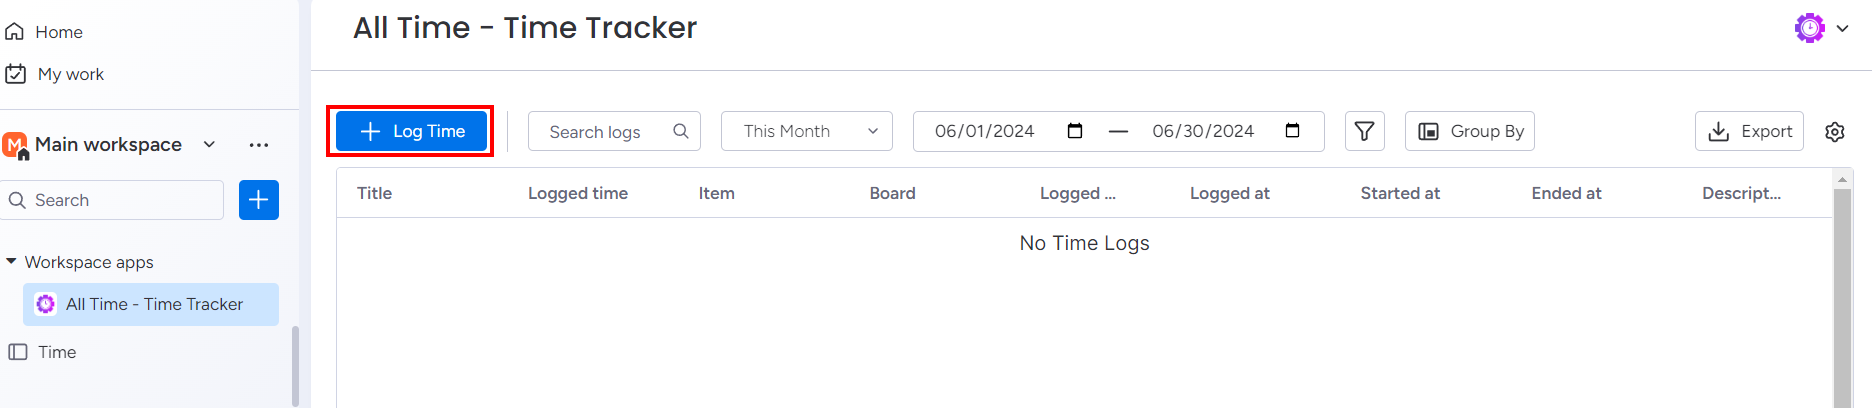
Getting Started
When you first install the app, it will be added to the Workspace apps section of the selected Workspace.
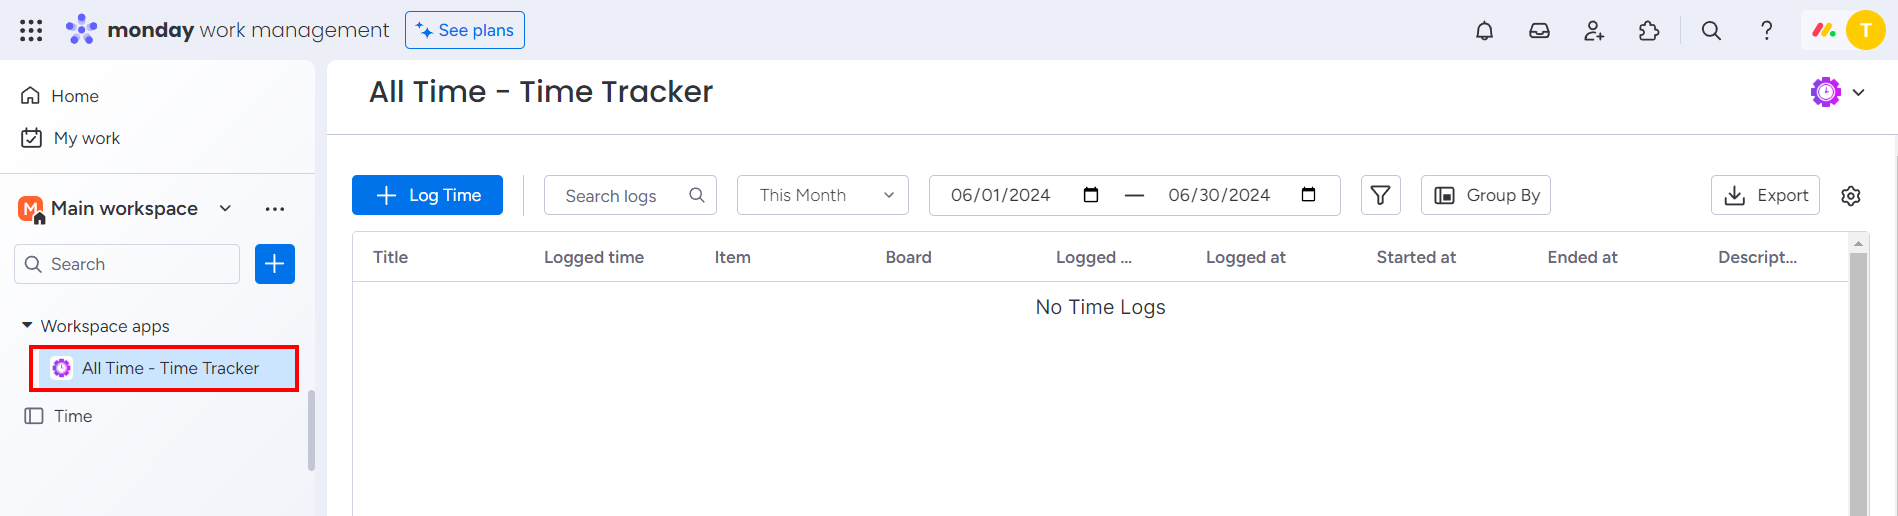
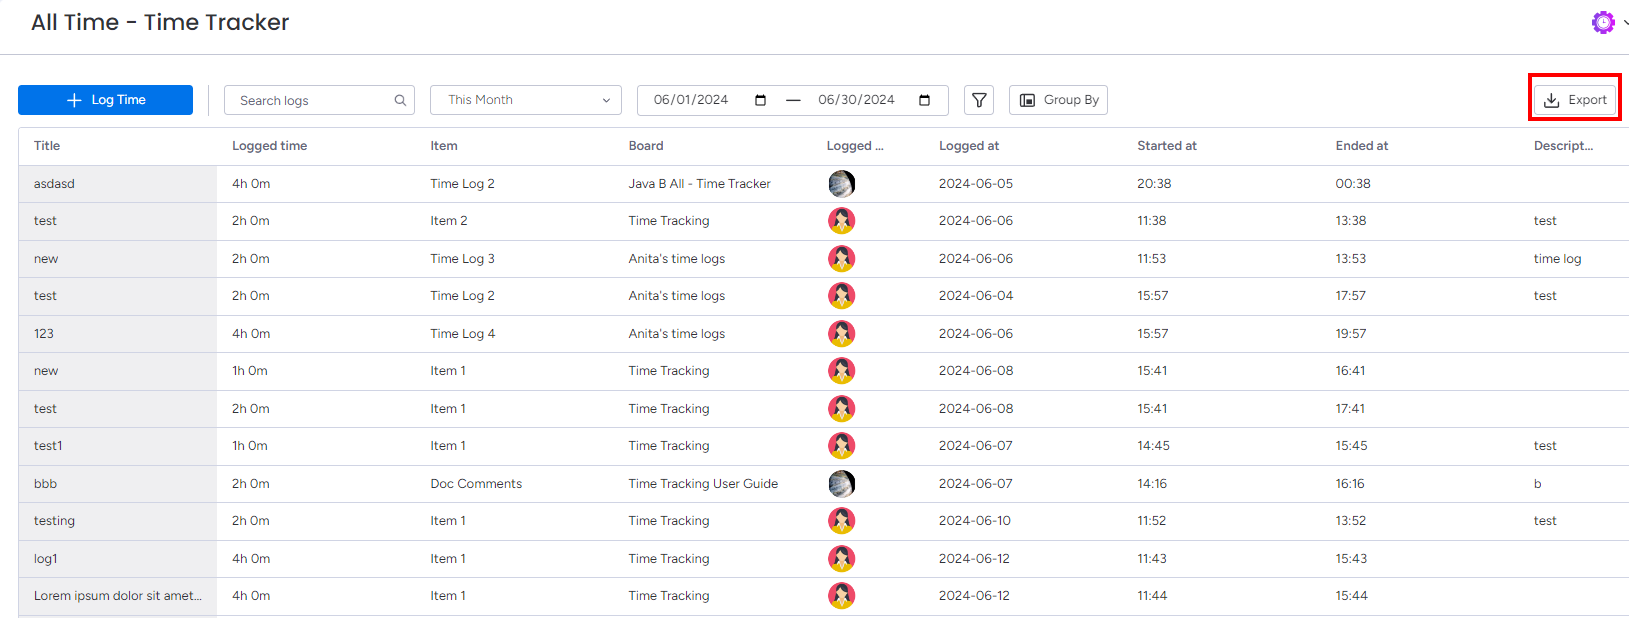
You will see all of your time logs across your boards and items here. On this page you can:
- Log time
- Search logs
- Select a time range
- Filter logs
- Group logs by parameters
- Export time logs
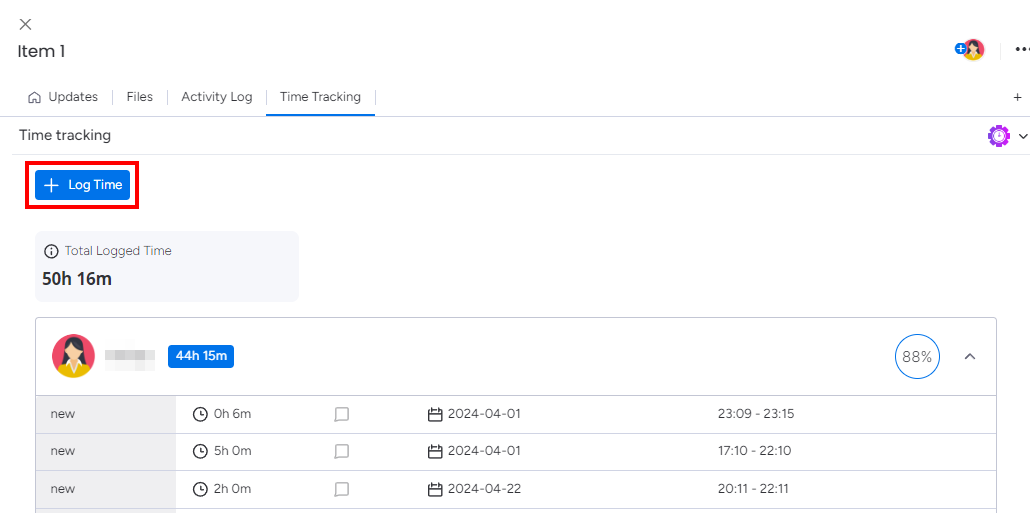
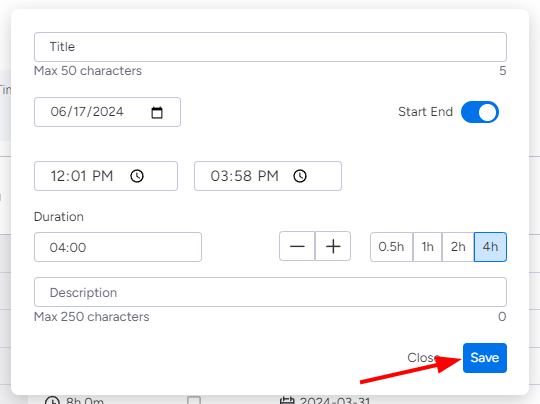
Logging Time
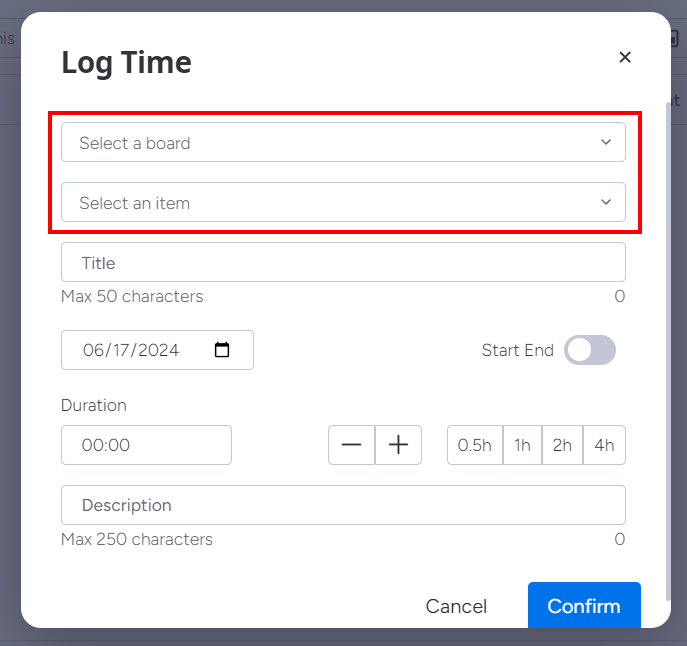
- To log time, open either the workspace view or item view of the app. The workspace view will let you log time to any item in the workspace, while the item view will only let you log time for that specific item.
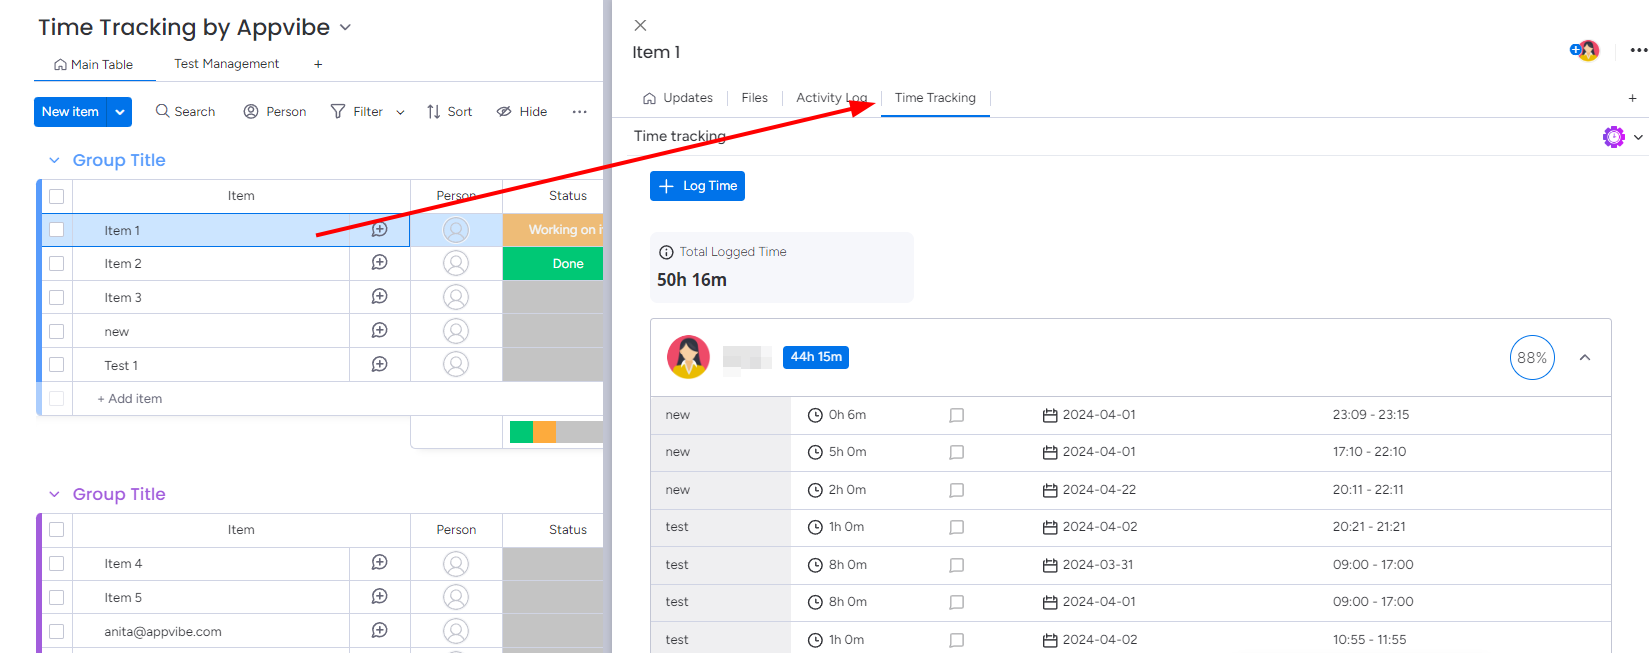
- To enter a time log, click on the "Log Time" button.

- Fill in the form. If you are using the workspace view, first, you have to select a board and an item. If you are using the item view, these field will not appear.

- Give a title to your time log.
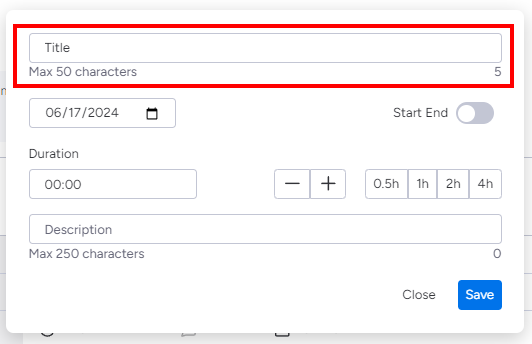
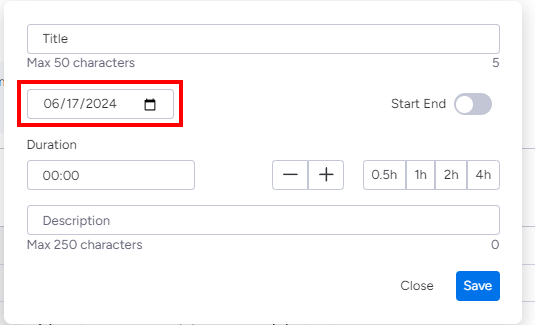
- Select the correct date.

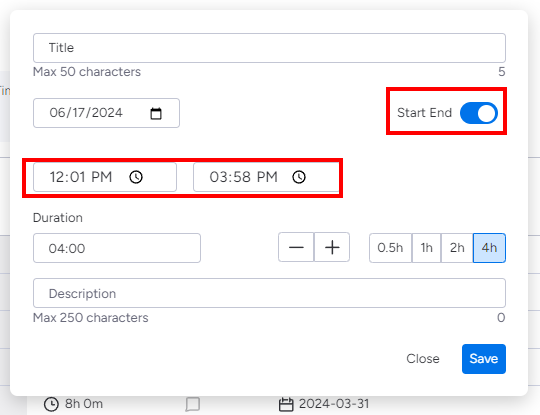
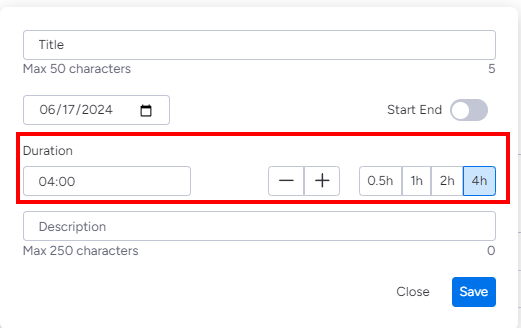
- Enter the duration. You can choose between entering the number of hours, using the quick buttons for the duration, or entering a timeframe.

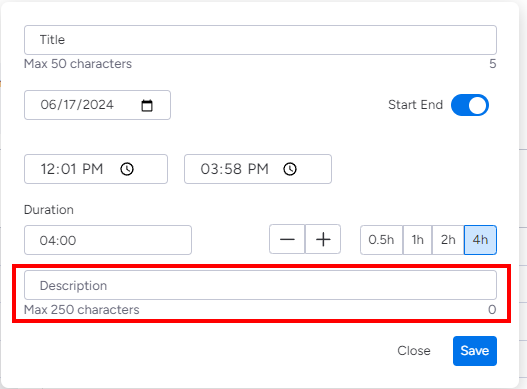
- Optionally, add a description to the time log.
- When all fields are filled, click on "Save".


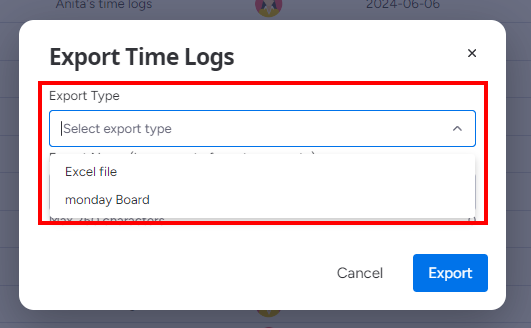
Exporting Time Logs
To export your time logs, go to the Workspace view of the app.
- Here, click on the "Export" button.

- Choose your export type. You can choose between a monday.com board and an Excel file.
- Give a name to your export, and click "Export".
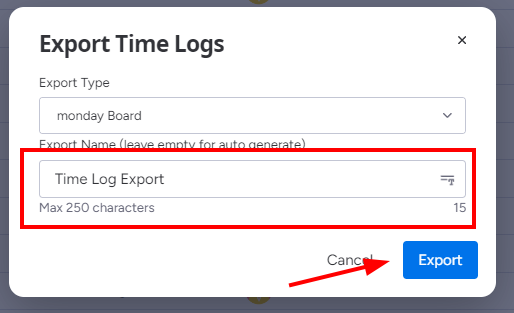
- Your time logs will be exported within a few seconds.


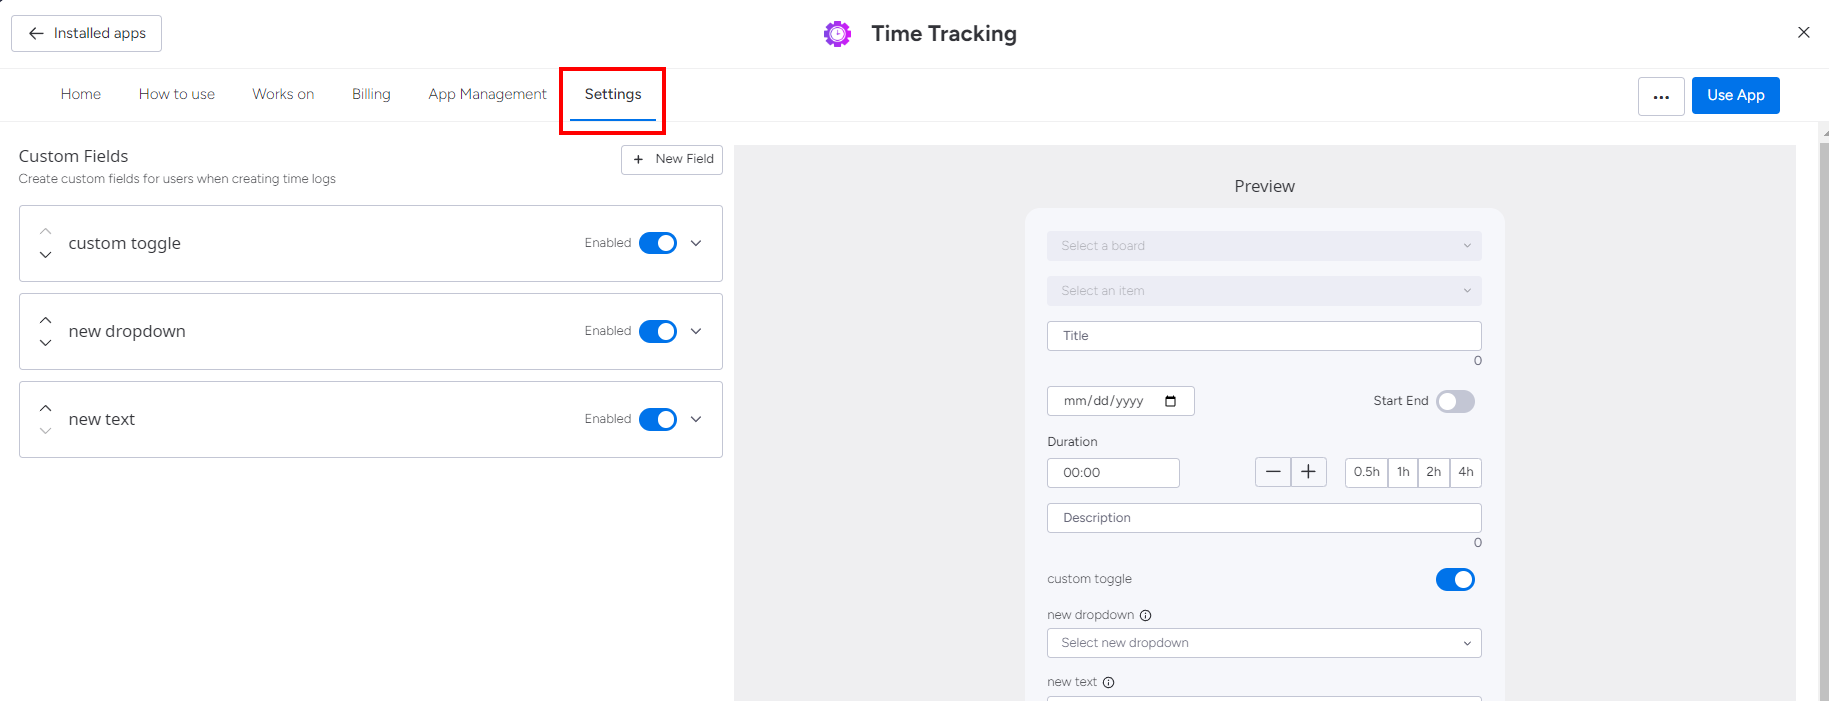
Custom Fields
In this application, you have the ability to add custom fields to your time logs. To define custom fields, follow these steps:
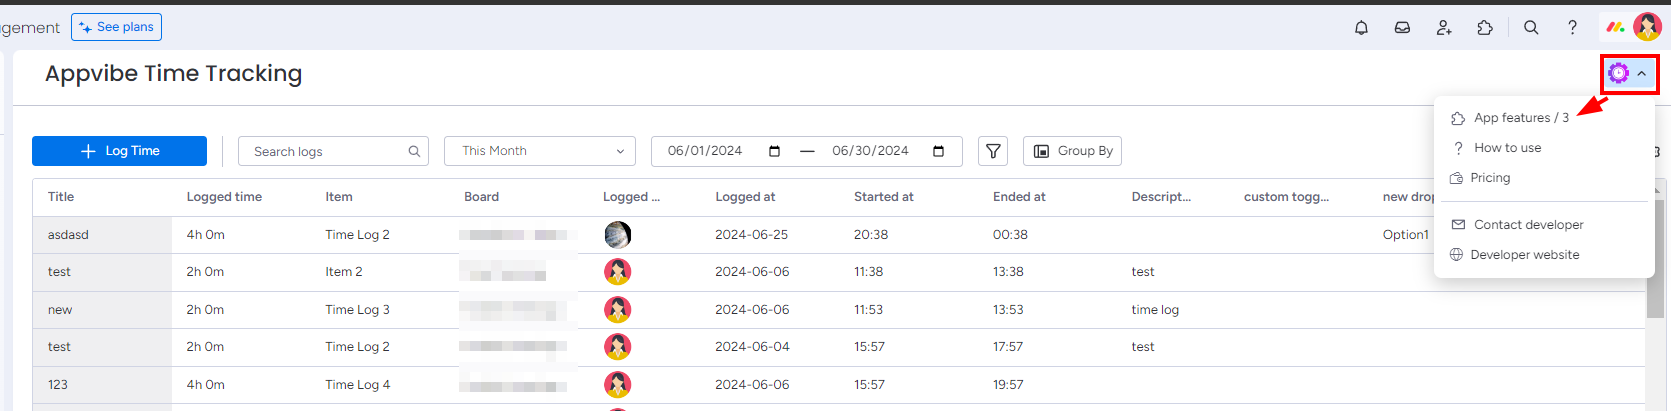
- Click on the app icon in the top right corner. From here, select "App features".

- Select the "Settings" tab on top.
- Click on the "New Field" button.


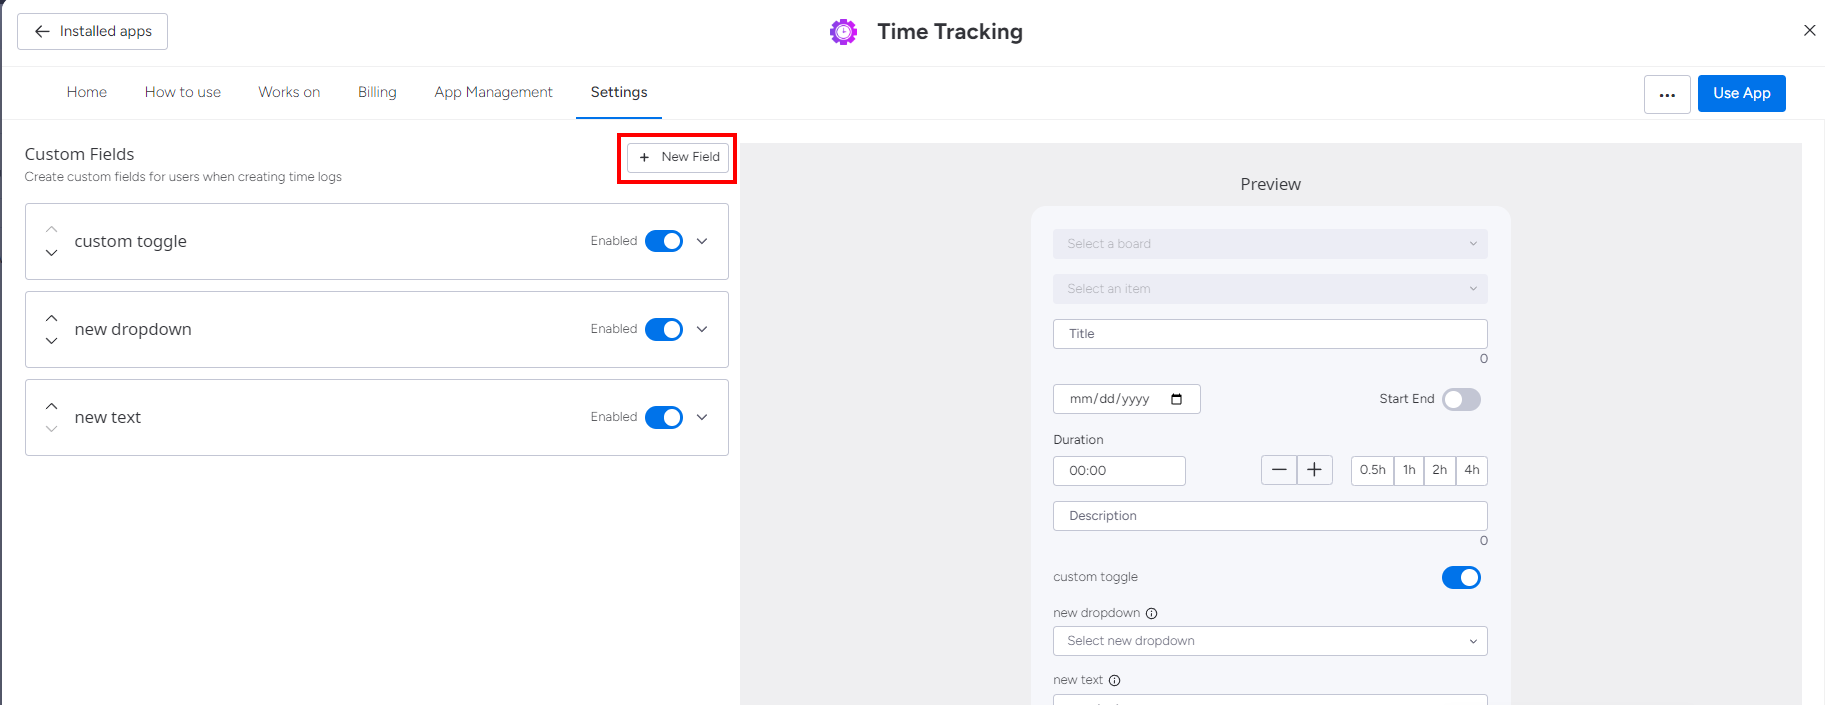
You can add three types of custom fields: toggle, dropdown or text.
Custom Toggle
To add a custom toggle, click on the "New Field" button and select "Toggle". 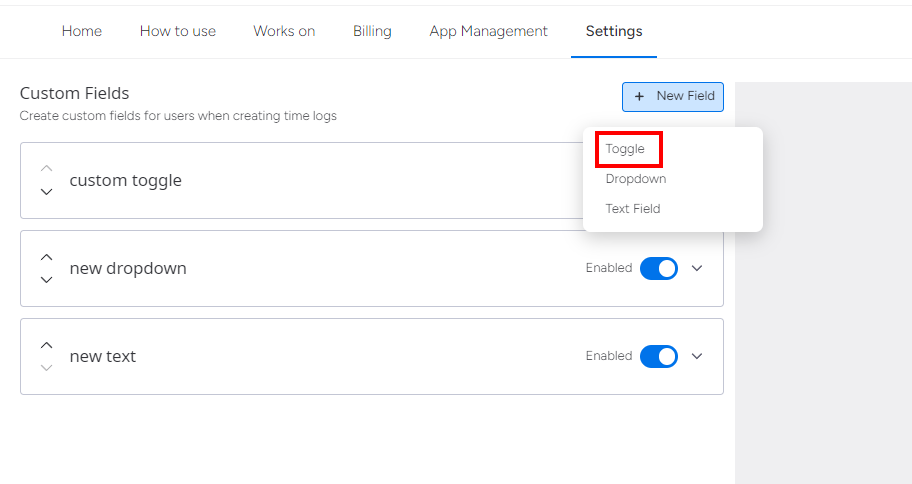
Name the field, and add a description. Then, you can select if the toggle should be optional/required, and whether it should be set to selected by default.
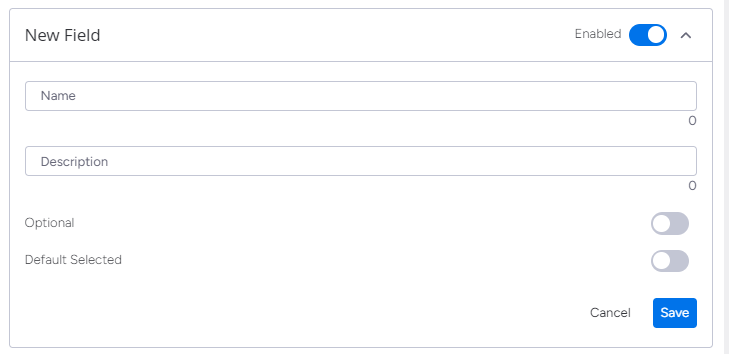
To start using the field, save your changes.
Custom Dropdown
To add a custom dropdown, click on the "New Field" button and select "Dropdown". 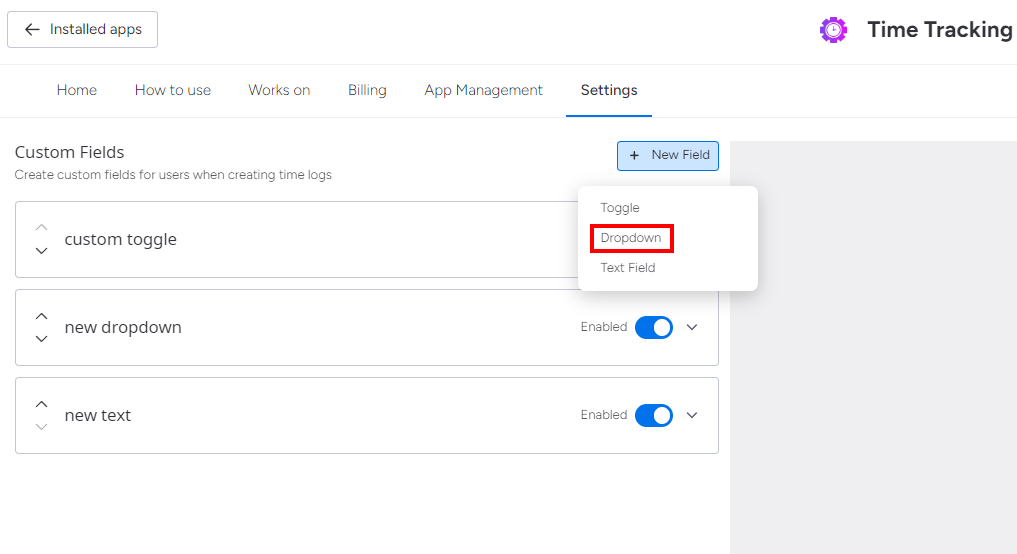
Name the field, and add a description. Then, you can select if the toggle should be optional/required, and add dropdowns to your field with the "Add Options" button. You can preview the options in the right part of the screen.
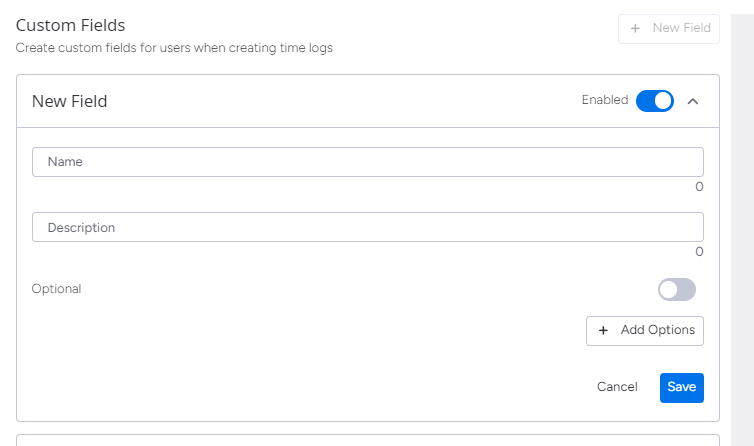
To start using the field, save your changes.
Custom Text Field
To add a custom text field, click on the "New Field" button and select "Text Field". 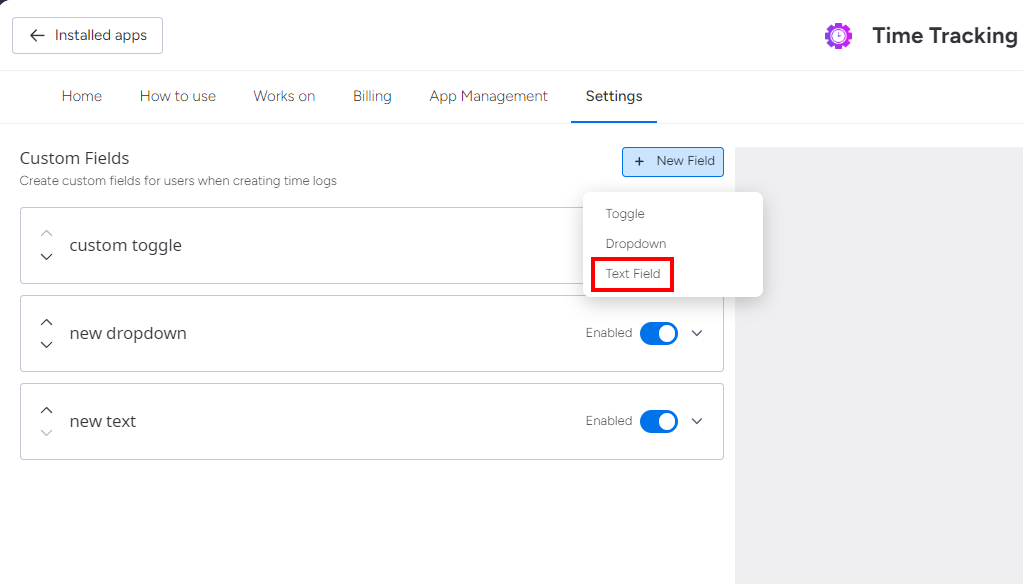
Name the field, and add a description. Then, you can select if the toggle should be optional/required.
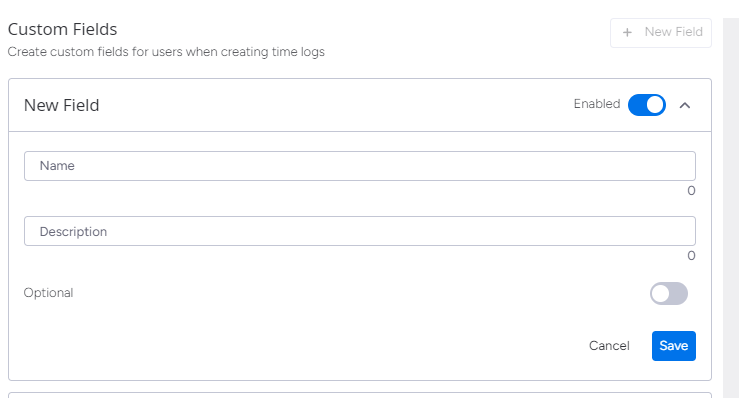
To start using the field, save your changes.
What users can use the app?
The app can be used by Admins and Members. Viewer Users and Guest Users can't use this app.
No Comments